
In DTF printing, some of the most frustrating issues in production are horizontal banding, visible PASS seams, and uneven gradient transitions. These problems are not only related to printhead condition, printer step accuracy, ink, and transfer film. RIP software image-processing algorithms and parameter settings can also affect the final print quality.
Especially in multi-PASS printing, the way adjacent print areas overlap and how ink droplets are distributed can influence image details and overall smoothness.
To meet different image requirements and production needs, Hanrun Paper DTF printing software offers 6 feathering modes and 3 spray types, allowing users to adjust settings based on actual printing results and optimize image details and transitions.
So, what are the differences between the six feathering modes? Which images are best suited to the three spray types? And can feathering and spray settings be used together?
In this guide, Hanrun Paper explains their working principles, key features, and practical applications to help DTF users make better parameter adjustments.
Feathering is an image-processing function designed to optimize ink transitions at the boundaries between adjacent PASS areas. By adjusting ink distribution within overlapping areas, it helps reduce visible seams and uneven transitions, making the printed image look more consistent.
During multi-PASS DTF printing, the printhead scans multiple times to complete an image. Adjacent PASS areas typically have a certain amount of overlap.

 Visible horizontal banding caused by inappropriate feathering settings
If ink distribution between adjacent areas is uneven, or the printer has step accuracy issues, visible seams, horizontal banding, or localized differences in ink density may appear in the printed image.
In simple terms, feathering focuses on making transitions between adjacent PASS areas smoother.
Hanrun Paper DTF printing software provides six feathering options to accommodate different image types and printing requirements.
| Feathering Mode | Key Features | Recommended Applications |
|---|---|---|
| None | No feathering processing is applied. The original PASS transition is retained. | Comparison testing and specific image output requirements |
| Light | Applies a mild transition effect. | Text, logos, and images with fine details |
| Normal | Balances image details and transition smoothness. | Regular color graphics and portraits |
| Strong | Applies stronger transition processing at PASS boundaries. | Gradients and transitions between color blocks |
| Extra Strong | Uses a more intensive feathering effect. | Complex edge transitions, such as feathers and smoke |
| Custom | Allows users to adjust parameters according to specific requirements. | Special graphics and customized production needs |


A higher feathering level does not necessarily mean better print quality.
Excessive feathering may affect local details and ink distribution. This is particularly important when printing with white ink, high ink loads, or under unsuitable drying conditions.
Users should select the appropriate level based on the image content and actual printing results.
While feathering mainly focuses on ink transitions between adjacent PASS areas, spray is another image-processing setting that primarily adjusts how ink droplets are distributed.
Different graphics have different requirements for ink droplet presentation.
For example:
☑️Portrait photos need to retain natural skin tones and fine details.
☑️Gradient graphics require smooth color transitions.
☑️Images featuring feathers or smoke need more refined edge transitions.
Therefore, in addition to adjusting feathering levels, users can select different spray types according to the characteristics of their images.
Hanrun Paper DTF printing software provides three spray options for users to compare and test.
| Spray Type | Key Features | Suggested Testing Applications |
|---|---|---|
| Spray | Basic spray mode. | Regular color graphics, portraits, and text |
| Spray A | An alternative spray-processing method with different image output characteristics. | Portraits, gradients, and complex color transitions |
| Spray+ | Enhanced spray mode. | Feathers, smoke, and special gradient graphics |


The actual performance of different spray modes may vary depending on image content, print resolution, ink volume, and printer configuration.
For more reliable results, we recommend testing all three modes using the same image and identical printing parameters before selecting the most suitable option.
Feathering and spray serve different purposes. Understanding their differences helps users adjust RIP software settings more effectively.
| Comparison | Feathering | Spray |
|---|---|---|
| Main Function | Optimizes transitions between adjacent PASS areas. | Adjusts ink droplet distribution. |
| Main Focus | PASS seams and ink transitions. | Image details, color appearance, and visual presentation. |
| Adjustment Options | Six feathering levels, including Custom. | Three spray types. |
| Main Application | Reducing visible seams and improving transitions between print areas. | Optimizing output appearance according to image characteristics. |
The two settings can be used together to fine-tune printing results.
If visible PASS seams appear in the printed image, first check printer step accuracy and calibration, then test different feathering levels.
If the overall transitions are already smooth but image details or ink droplet presentation are still unsatisfactory, compare the three spray types to find a more suitable setting.
Different graphics require different levels of edge smoothness, detail retention, and ink droplet distribution. Therefore, using the same settings for every image is not always the best approach.
The following table provides recommended starting points for parameter testing.
| Image Type | Suggested Feathering Mode | Suggested Spray Type | Key Adjustment Focus |
|---|---|---|---|
| Text and Logos | None / Light | Spray | Preserve sharp text edges and clear outlines. |
| Portrait Photos | Light / Normal | Spray / Spray A | Maintain natural skin tones, facial details, and tonal depth. |
| Regular Color Illustrations | Normal | Spray / Spray A / Spray+ | Compare overall color appearance and image details. |
| Gradient Graphics | Normal / Strong | Spray A / Spray+ | Check whether color transitions are smooth and natural. |
| Feathers and Smoke | Strong / Extra Strong | Spray A / Spray+ | Improve fine edge transitions. |
| Special Graphics | Custom | Select based on testing results. | Adjust parameters according to image structure and specific requirements. |
These recommendations are starting points for testing, not fixed optimal settings.
Actual results depend on several factors, including print PASS count, image resolution, ink volume, transfer film, white ink settings, and the drying process.
To identify the most suitable settings, we recommend a step-by-step comparison test.
Step 1: Keep the Basic Printing Conditions Consistent
Use the same test image and maintain identical print resolution, PASS count, ink volume, and printing materials.
Step 2: Test Different Feathering Levels
Start with None, Light, and Normal. Compare the results before moving on to higher feathering levels if necessary.
Step 3: Compare Different Spray Types
Keep the feathering settings unchanged and test Spray, Spray A, and Spray+ separately.
Step 4: Evaluate the Printed Results
Compare the following aspects:
☑️PASS seams and horizontal banding
☑️Edge sharpness and image details
☑️Gradient smoothness and color transitions
☑️Local ink distribution and white ink performance
Step 5: Record the Production Parameters
Save the test results and corresponding settings for different image types. This makes it easier to reproduce successful printing results in future production runs.
Testing one parameter at a time helps identify which setting affects the final output, avoiding confusion caused by changing multiple parameters simultaneously.
Q1: Does a higher feathering level always produce better print quality?
No. Higher feathering levels provide stronger transition processing between PASS areas, but they may also affect local details and ink distribution.
For text and logos that require sharp outlines, excessive feathering may not be suitable.
The best setting depends on the image type and actual printing results.
Q2: What should I do if horizontal banding remains after adjusting feathering settings?
Feathering cannot solve every type of horizontal banding issue.
If visible lines remain after parameter adjustments, we recommend checking the following factors:
☑️Printhead condition: Check for clogged nozzles, missing nozzle lines, or abnormal ink ejection.
☑️Printer step accuracy: Check whether the step settings and media feeding system are working correctly.
☑️Printhead calibration: Verify printhead alignment and bidirectional printing settings.
☑️Printing parameters: Check whether the PASS count, ink volume, and printing speed are properly matched.
☑️White ink and curing process: Check whether white ink output, drying temperature, and powder application are properly coordinated.
If the banding is caused by mechanical stepping errors or printhead issues, adjusting feathering settings alone will generally not solve the underlying problem.
Consistent DTF print quality requires more than reliable printing equipment. It also depends on the coordination of RIP software algorithms, inks, transfer films, and production processes.
Take the Hanrun Paper Super A-808 DTF Printer as an example. Designed for professional garment printing and high-volume production, it features eight Epson I3200-A1 printheads, an 800 mm printing width, and support for a 13-color configuration.

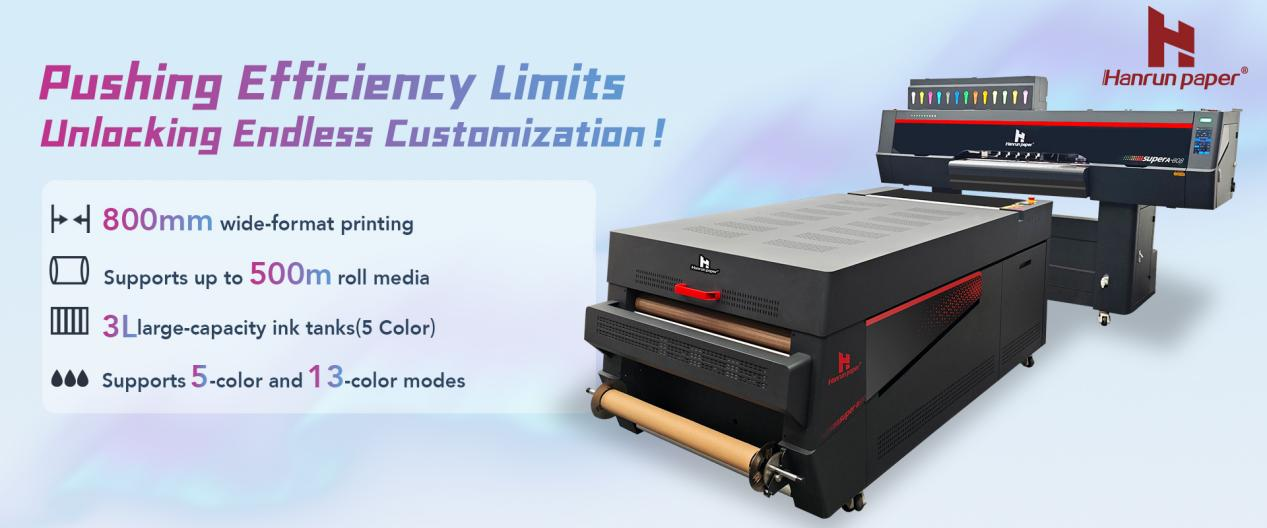
Combined with Hanrun Paper DTF printing software, users can select from six feathering modes and three spray types to further optimize PASS transitions and ink droplet distribution according to different image requirements.
Hanrun Paper continuously develops its printing equipment, supporting consumables, software, and technical support to provide global printing businesses with more professional and comprehensive DTF digital printing solutions.
Our goal is to help customers improve production efficiency, maintain consistent print quality, and strengthen their competitiveness in the digital printing market.

